Showing posts with label Heat embossing. Show all posts

Sunday, August 4, 2013

Paper Craft My Challenge - Fashion Colored Inspired - Jun 2013 to Jul 2013 (past bi-monthly challenge)

Hey everyone

Its been months that I did not update anything in my blog. I was busy with random activities going around & only now I have the free time to update my idea blog here.

Something that I missed to post about my blog about our bi-monthly challenge held in Jun to Jul 2013.

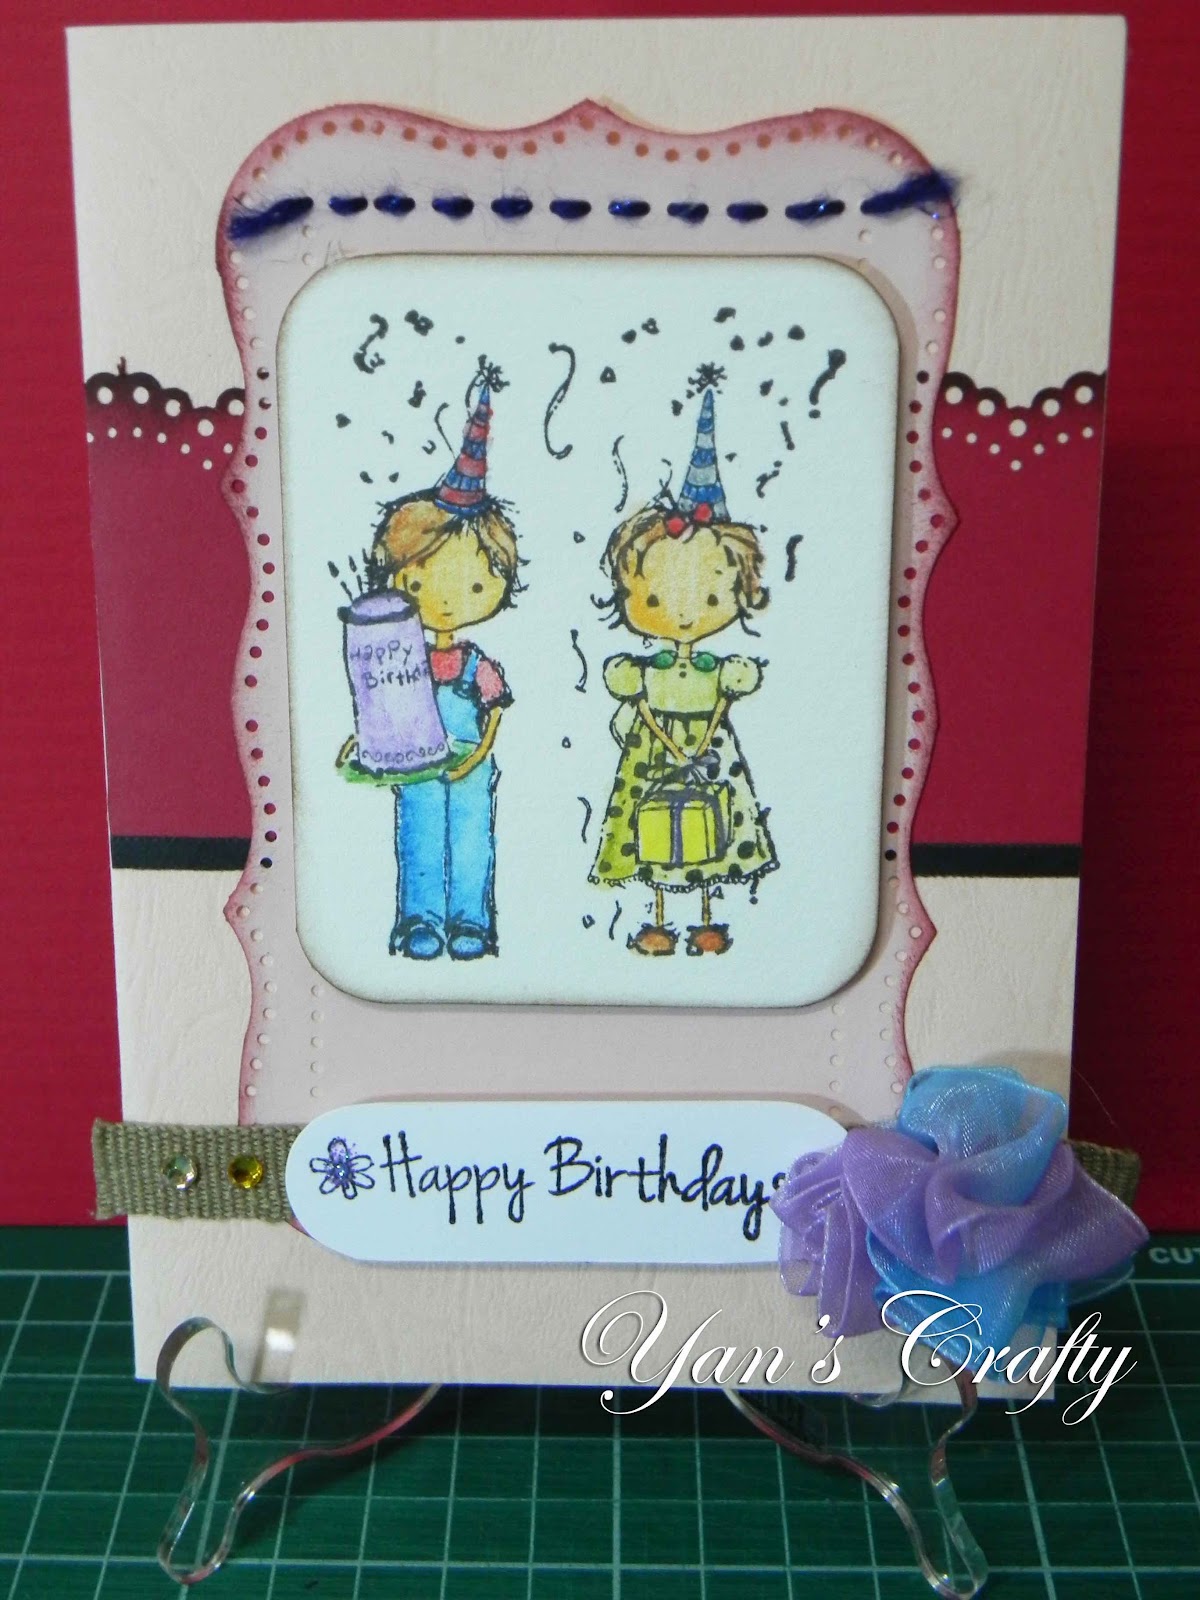
Theme: Fashion Colored Inspired

Here is my inspiration card for "Fashion Colored Inspired".


Card recipe:
1. Paper & card stock from local stationery shop.

2. Acid free papers.
3. Luna Aquarrel water color pencils.
4. Clear stamps: Bentley Bear (Adam Pescott), WRMK Polka Dots, KaiserCraft - Life Sentiments
5. Embossing powder, embossing stamp pad & Versacraft ink pad (Orange-Yellow tone).

Thank you for visiting my humble blog.

Do follow us at Paper Craft MY Challenge or perhaps follow my blog too.

Friday, June 1, 2012

Sketch 167 (Card Patterns) & June's Colour Combo Challenge (Daring Cardmakers)

Today I made another card to enter challenges organized by Card Patterns & Daring Cardmakers.
In addition, I made this card specially for one of my friend who's birthday fall in the month of June. I hope she will love it.


In Sketch 167 by Card Patterns, they have provided the sketch layout as below.


Meanwhile in June's Colour Combo Challenge by Daring Cardmakers, they have provided the colour combination of Red, White, and Blue - to celebrate the Queen's Diamond Jubilee.


Here is my card design to enter both of the challenges.


I added string of thread into the holes & stamped image was colored with Luna Aquarrel watercolour pencil.


Here is the nearer view of the thread. It is thick with some shiny thread in it. I bought this yarn of thread from eCo-cent$. It is real cheap & grabbed a lot of other threads (limited stocks).


In this Happy Birthday sentiments, the words are heat embossed. It is hardly to see the embossed word here. I added a little bit of color from Sharpie permanent marker. A dot of glitter on it.


Nearer view of my ribbon scrap & rhinestone sticker. The ribbon scraps was actually taken from a spoilt paper bag.


This is one of my favorite. DIY the ruffle ribbon by myself. I pulled the thread & make it like a flower. Twist a little bit here and there & stitched on the brown ribbon.


Card recipe:
1. Papers & card stock from local stationery shop.
2. Paper punches using MS Doily Lace & Cherish.
3. Embellishment – rhinestone sticker, scraps (ribbons & strings).
4. Distress ink from Ranger distress ink - Walnut stain & Aged Mahogany.
5. Clear stamp:
     a. Sentiments (Happy Birthday) designed by Adam Pescott.
     b. Birthday from Prima.
6. Glitter glue on the stamped flower.

Thank you for visiting my humble blog.


Monday, March 19, 2012

Wedding Card

Every year I have few wedding invitation from relatives, friends and colleagues.

Yet, not all of the wedding invitation I made handmade card to the lovely couple. This year, I try to achieve my target to make a nice wedding card to wishes them "Happily Ever After".

This round, I make a wedding card for one of my friend (I hope they don't read this post as it was supposed to be a surprise card to both of them).

Basically, I look into vintage look.


A sneak peak of my card - Congratulations! on you wedding day...


This is the tag I did for the word stamping. The words was heat embossed so it will looks like embossed word. I add a few pearl sticker on the left & right side of the tag. And even I distressed the side of the tag. I used a card stock which give a blend of orange-brown with white.

Secondly, I dabbed the distressed ink with sponge on the doily paper. I used a brown string tied with button. This part, you can see it at the result photo.


Then, I used many flower embellishment to create a nice frame flower corner. I placed the cute lovely bear near the corner. I purposely placed it at the corner so it gives a little effect of shyness.


See, how cute & lovely it is?


Lastly, this is the result of my lovely creation specially make for them. Happily Ever After~!